
1. Record what is not working
Before creating the file, reproduce the problem once and write down the affected accessory, room, and action. Note what you expected, what HomeDeck showed, and whether the same accessory works in Apple Home.
Keep the affected home selected in HomeDeck and avoid renaming or removing the accessory until after the export. The file is a snapshot of the current HomeKit and Matter structure, not a continuous activity log.
- Accessory and room name
- Expected and actual behaviour
- Whether it works in Apple Home
- Approximate time of the problem
- Whether the problem appears on iPad, Apple TV, or both
2. Understand what the diagnostic file contains
The JSON file includes the HomeDeck version and build, operating-system version, HomeKit homes and accessories, service and characteristic types, identifiers used by HomeKit and Matter, and the values available when the file is created.
HomeDeck does not add passwords, authentication tokens, or account content to the file. Device and room names, technical identifiers, and current accessory values can still describe your home, so send the file only to the support contact helping with the issue.
3. Create the diagnostic QR code
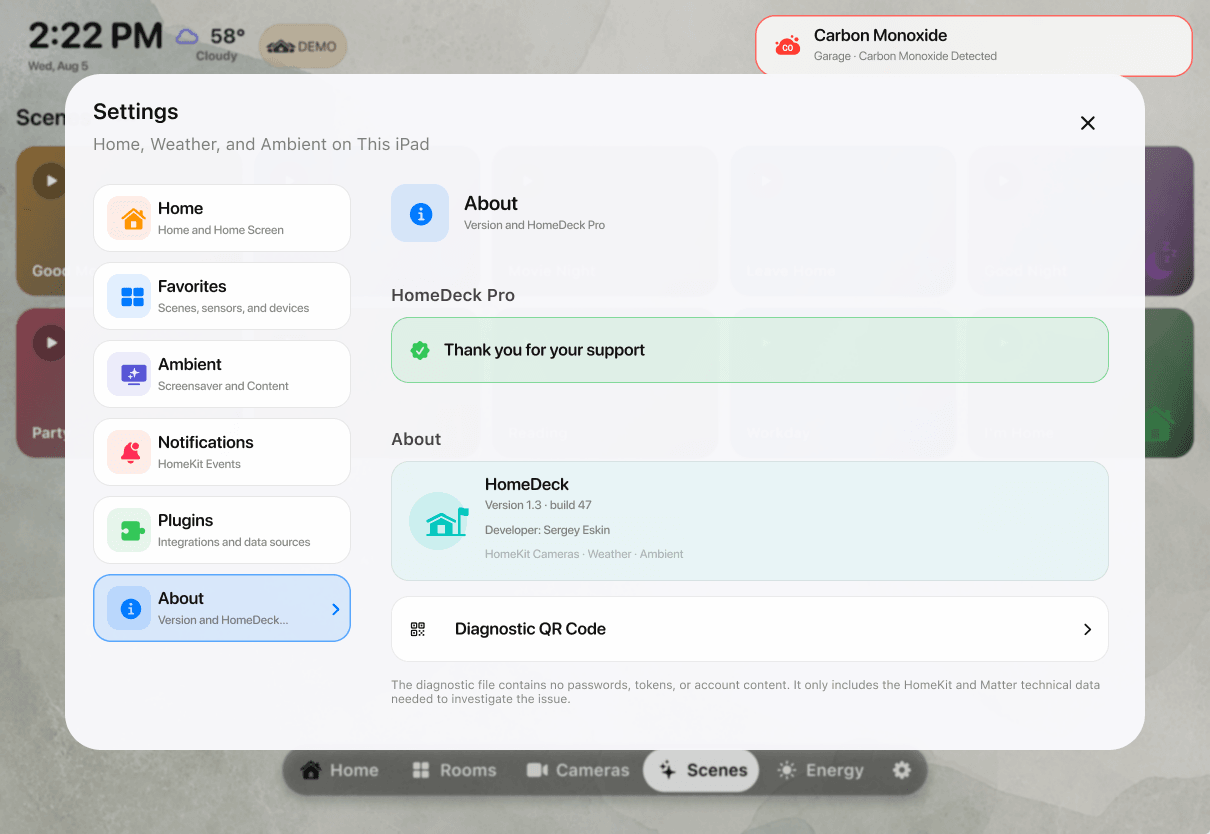
Open HomeDeck Settings, select About, and choose Diagnostic QR Code. Wait while HomeDeck prepares a temporary local download address and displays the QR code.
Keep this screen open until the file has finished downloading. HomeDeck serves the file only from the iPad or Apple TV on your local network; closing the diagnostic screen ends that temporary transfer.
- Settings
- About
- Diagnostic QR Code
4. Download the file with a phone
Connect the phone to the same Wi-Fi network as the iPad or Apple TV. Open the phone camera, scan the QR code, select the detected link, and download the JSON file when the browser opens.
On iPad, Share link can send the temporary download address to another device on the same Wi-Fi network. It does not upload the diagnostic file to HomeDeck support and it is not a permanent internet link.
5. Attach the downloaded file to an email
Create an email to HomeDeck support and attach the downloaded JSON file from Files or your phone's downloads. Do not send only the QR image or the local link: the recipient cannot open that address from another network after the diagnostic screen is closed.
In the message, include the affected accessory and room, the expected and actual behaviour, whether Apple Home can control the accessory, and whether the issue occurs on iPad, Apple TV, or both. A screenshot or short video can help when the problem is visual.
6. If the QR code or download does not work
Confirm that both devices use the same regular Wi-Fi network. Guest networks, VPNs, and router settings that isolate wireless clients can prevent the phone from reaching the temporary address.
Keep HomeDeck open on the QR screen, allow Local Network access if iPadOS asks, and try again. If the transfer still fails, include the HomeDeck version, platform, and the message shown on screen when contacting support.